
Soldiers, Sailors, and Airmen of the Allied Expeditionary Force:
You are about to embark upon the Great Crusade, toward which we have striven these many months.
The eyes of the world are upon you. The hopes and prayers of liberty-loving people everywhere march with you. – General Dwight D. Eisenhower, USA, Supreme Commander, Allied Expeditionary Force, in his Order of the Day for June 6, 1944
Crusade in Europe is a strategy wargame that focuses on the first six months of the 1944-1945 campaign in Northwest Europe during the “endgame” stage of the Second World War. Published in late 1985 as part of MicroProse Software’s Command Series trilogy,[1] Crusade in Europe was designed by MicroProse co-founder Sid Meier and Ed Bever. It was programmed for many platforms, including Atari, Commodore 64, Apple II, and IBM personal computers.

Like many strategy games written for early personal computers in the mid- to late 1980s, Crusade in Europe was not revamped by MicroProse during its heyday in the 1990s. Although it was co-created by the legendary game designer who is best known as the progenitor of the Sid Meier’s Civilization franchise that is still going strong in the 21st Century, the Command Series trilogy was consigned to the dustbin of history, and other, more complex games – such as Gary Grigsby’s War in the West – have eclipsed its games, especially Crusade in Europe.
Fortunately, the game has its hardcore fans, and apparently, Atari, one of the companies that own the rights to many of the original MicroProse’s titles, reissued Crusade in Europe and its two Command Series stablemates earlier this year via Steam for the incredibly affordable price of $6.99 apiece.[2]
So, let’s say that you are interested in Crusade in Europe after reading yesterday’s review of this game and that you have decided to mosey on over to Steam to buy it.


And let’s also assume that you want some pointers on how to play Crusade in Europe well enough to consider yourself a competent theater commander of great armies during history’s greatest clash of arms.
Here are some pointers that will make your introduction to Crusade In Europe a bit easier, especially if you choose to dispense with the game manual, which is not included in the download of the game. (You can find the link to the PDF version in Crusade in Europe’s Community Hub page.)

Crusade in Europe: Or How to Survive and Thrive on the (Digital) Battlefields of WWII

If a soldier would command an army, he must be prepared to withstand those who would criticize the manner in which he leads that army. There is no place in a democratic state for the attitude which would elevate each military hero above public reproach simply because he did the job he has been trained and is paid to do. – General of the Army Omar N. Bradley, USA, A Soldier’s Story
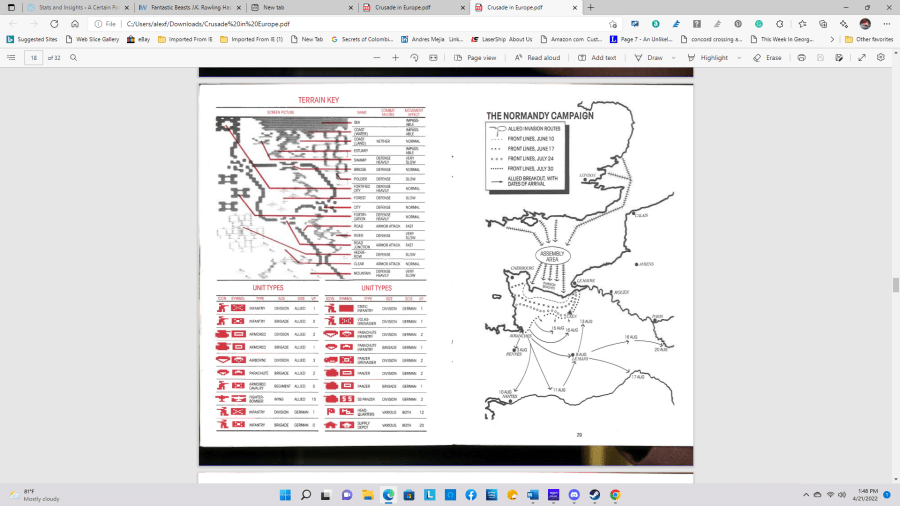
To get a grasp on how to play Crusade in Europe for the first time, I suggest you start with the first scenario, The Battle for Normandy and its first variant, Clearing the Beaches. It is a short scenario; it starts at 6 AM on June 6, 1944 and ends at 6 PM on June 11, 1944. It is also a mission with a single objective: capture all five of the Allied invasion beaches (UTAH, OMAHA, SWORD, JUNO, GOLD), link them up by clearing them of German forces, and push inland as far as possible before the scenario ends.
I don’t want to write a long dissertation about how you should play the entire scenario, so I will just limit myself to discussing the initial situation and the unit types involved, while suggesting a few tactical moves to get you started and help you understand how certain things work in Crusade in Europe. I will sometimes quote from the game manual since it’s better if you get some information from the original sources.
Ready? Okay, let’s go to war!
Stand To!
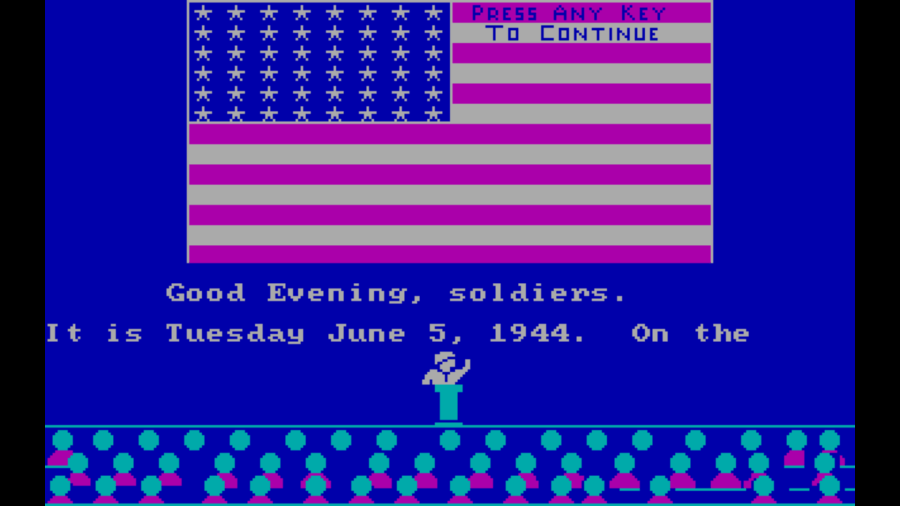
The title page and situation map of Occupied Europe on June 5, 1944, in the “Crusade in Europe” game manual. 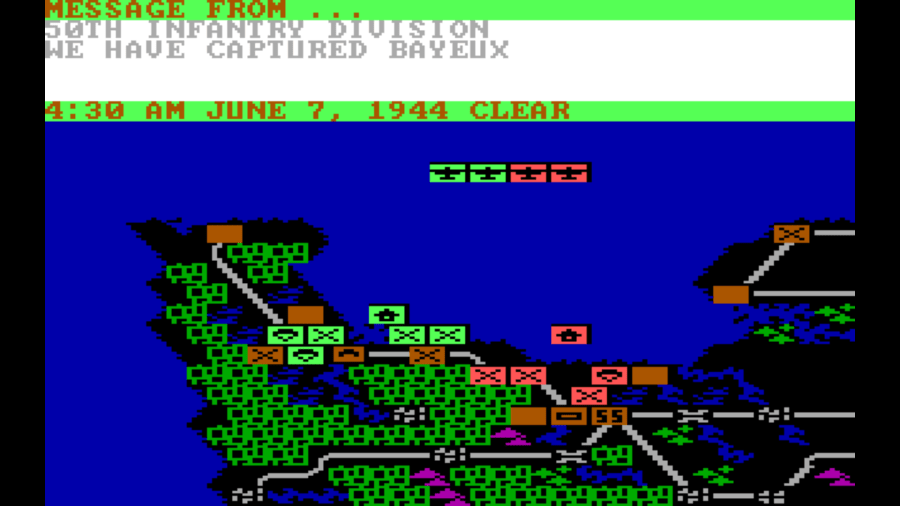


The humble supply depot. Guard it with at least one good combat unit – your army’s existence depends on it! (C) 1985, 2022 MicroProse/Atari via Steam 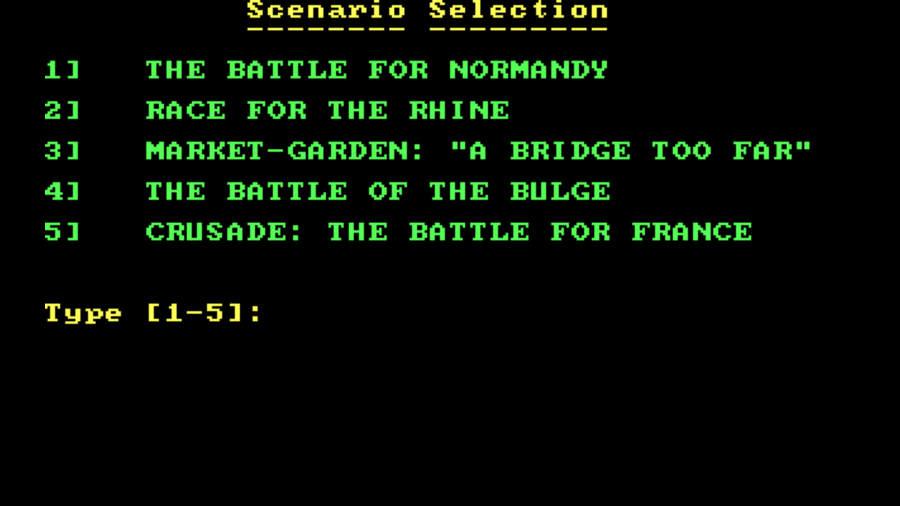


(C) 1985, 2022 MicroProse and Atari via Steam 

Crusade in Europe also features other battles of the Northwest Europe Campaign. Here we see Operation Market-Garden at its start.
All images are (C) 1985, 2022 MicroProse & Atari via Steam
Since this is your first time playing, set all your game options to the easiest level of difficulty available and choose the Allied player for yourself. Only after you’ve played Crusade in Europe as the Allies at least once should you choose to play as the Germans. In this scenario, they are the underdog even though they are technically superior in numbers in France on June 6, 1944.
Once you have configured the game settings, it’s time to go to battle! Hit ENTER, then as soon as the map screen appears and you see the units, which are already either ATTACKING or DEFENDING per the historical situation at 6 AM on June 6, at their initial positions on the coast of Normandy. Hit F (for FREEZE) and examine the situation before you give your first command.
Now that the game is paused, survey the battlefield to assess the situation. I usually start by going to each of my units from west to east.
(The Allies’ “right” flank, which is also the American sector, is on the western side of the map since their axis of advance is from north to south, the Allied right flank is on the observer’s left, while the Allied “left” flank, which is the British/Canadian sector, is on our right.)
In Crusade in Europe, American units are identified as green symbols, Anglo-Canadian forces are identified as red symbols, whilst German forces are black symbols. Each unit type can be identified by its simplified NATO style map symbol.
From west to east, we can see that three American divisions – the 82nd and 101st Airborne and the 4th “Ivy” Infantry Division (ID) are fighting on and behind UTAH beach, which is on the southeast coast of the Cotentin Peninsula. The airborne divisions are already in defense mode, but move your cursor onto each unit – use the directional arrow keys to do this – and hit the D action command to DEFEND, followed by the H command for HERE. This will tell the paratroopers, which are lightly armed and not strong enough to attack the tough Landsers of the German 91st ID, to dig in on the N-13 Highway that connects Cherbourg (a CRITICAL location that is worth 41 Victory Points, or VPs) to Paris. Keep the airborne troops there; they will shield the right flank of the seaborne invasion from the German 91st ID. They will also separate the 91st from the two German static infantry divisions (static) that are deployed between UTAH and Cherbourg. [3]
The 4th ID has two possible choices as to which German unit to attack on D-Day. In the game, UTAH Beach is already in Allied control (it’s worth 31 VPs), but the Ivy Division is opposed by two enemy units.
To its south, the 4th ID is blocked from the town of Carentan (10 VPs) by the small but elite 6th Parachute Regiment. To its north, the 709th Static ID is hunkered down in the swampy expanses beyond UTAH Beach.
Either choice is acceptable, since the goal of Clearing the Beaches is to inflict as many casualties as possible upon the Germans while keeping your own casualties down, while at the same time linking the five Allied beaches and consolidating them into one continuous beachhead.
In the longer Battle of Normandy scenarios, I usually leave the 6th Parachute Regiment alone until the 29th “Blue and Gray” ID extricates itself from OMAHA Beach (31 VPs) and its deadly struggle with the German 352nd ID. For this tutorial, though, I recommend you order the 4th ID to ATTACK the German paras in Carentan.
In the center of the American sector lies OMAHA Beach. Here, Crusade in Europe depicts the assault on this beach being carried out by two full divisions, the 29th ID on the “right,” and the 1st “Big Red One” ID on the “left.” (In real life, although the assault landing on “Bloody Omaha” was a joint endeavor by those two units, the first waves involved a regimental combat team from each division under the nominal command of the Big Red One.) They’re opposed by the German 352nd ID, which is in FORTIFIED formation.
Here, you don’t have a smorgasbord of options to capture OMAHA. The only way to get the Germans off that beach is via a frontal attack. Order the 1st and the 29th IDs to attack the 352nd. There’s no way to maneuver either of your divisions to the 352nd’s flanks, and the closest British unit, the 50th ID, still needs to land on GOLD Beach and capture it (CRITICAL, 31 VPs) before it can attempt to assist its American comrades-in-arms.
Now is a good time to move your cursor up to where you see the four Allied Tactical Air Wings’ symbols. The game depicts them (the U.S. IX and XIX Tactical Air Wings, and the British 84 and 83 Tac Air Groups) on the Bay of the Seine as if they were carrier-based. They are based off-map in southern England, but for ease of play Crusade in Europe shows the fighter-bombers “based” at sea.
The 352nd ID is dug in and will inflict heavy casualties on your seaborne divisions at OMAHA, so it might be wise to order airstrikes by at least two air wings. Heck, use all four if you think it’ll help. Keep in mind that airstrikes cause damage to enemy units, but they don’t destroy them outright. Also, tactical air wings are powerful, but they also suffer casualties from dug-in defenders. So use them with caution – and don’t expect miracles from your fighter-bombers.
On the British sector, you have at least three options:
- Attack the 716th Static ID with the British 50th and Canadian 3rd IDs in a coordinated assault and order the 3rd British ID to land on SWORD Beach (31 VPs), move inland one hex beyond to just above Caen (another Critical location but one that you should not go for in this brief scenario; it is guarded by the 21st Panzer Division) and go on Defense mode there
- Attack the 716th ID with just the 3rd Canadian ID, send the 3rd British ID to “invest” Caen as described above, and peel the 50th British ID to the “right” to assist the Americans at OMAHA
- Do the first two steps noted above, but instead of sending the 50th British ID to aid the U.S. assault on OMAHA, order it to capture Bayeux (12 VPs)
If you have decided to keep one or both of your British air wings for use to support the Anglo-Canadian landings, you must figure which enemy targets to strike with them. You could bomb the 21st Panzer down in Caen, but that unit is tough – it is in Deployed formation, so it is not as vulnerable as if it were in Mobile or Transport mode. I usually sic my fighter-bombers on the hapless 716th Static ID; that usually loosens their grip on the beach they are defending, and the 3rd Canadian Division can push inland rather quickly, compared to its American counterparts on OMAHA.
Finally, we come to the far “left” flank of the invasion area, where the British 6th Airborne is in Defense mode and holding on to the Orne River bridge. Even though it is already dug in, order it to DEFEND by issuing the D Action command and the H (for Here) Objective command.
Key Concepts
Your task will not be an easy one. Your enemy is well trained, well equipped, and battle-hardened. He will fight savagely. – General Dwight D. Eisenhower,USA, Supreme Commander, Allied Expeditionary Force, in his Order of the Day for June 6, 1944
Here are some important concepts that you need to know if you are going to assume command of your forces in Crusade in Europe. They are distilled from the game manual and my experiences with the game.
- Crusade in Europe is not turn based. “Instead, the computer conducts the activities of units continuously, while a clock ticks off the simulated passage of time. The computer processes each unit approximately once every eight game hours.” – from the game manual
- Units do not obey orders instantaneously. Just as in real war – especially during WWII, when we did not have satellite comms or battlefield computers – there is a lag between the time you issue a command and the unit you gave it to carries it out. It takes several minutes (a few “hours,” in the game’s accelerated-real-time) between the moment you tell the IX Tac Air Wing to attack the 352nd Infantry Division and when the fighter-bombers swoop in to strike
- Each unit type performs some tasks better than others in different circumstances. Infantry is great at defending, especially in cities, fortifications, and rough terrain. However, in situations where infantry units are attacking, it is wise to do so when you have a 3:1 ratio in your favor, and have support from armored units and air units.
Armored units are excellent when they are on the attack on open ground and supported by infantry. In ideal conditions – good weather, flat, easily traversable terrain, and roads, and with other units in support, armored units can move the farthest and fastest. However, in close terrain (such as Normandy’s infamous hedgerow country, or in cities) armor is not as efficient and suffers high casualties against well-placed defending infantry.
- Airborne units are elite light infantry units that should be used to defend key VP locations or the flanks of the invasion area. For Clearing the Beaches, they should not be ordered to attack or move from their current position
- It is usually a good idea to use two, even three divisions against one enemy division. The more, the merrier, I say. However, this approach is risky since, especially in Clearing the Beaches, you have a finite number of units on hand, and you can find yourself with gaps in your front that enemy forces can exploit
- For the attacker, you must remember that weather, time of day, and terrain affect how well – or how poorly – your units will perform. In the context of Crusade in Europe, which is set in 1944, attacks fare better in daylight than at night. Air units can only fly during the day and in good weather conditions. And tanks will suffer high losses in rough terrain and cities where infantry units are dug in
- Keep your supply lines safe and secure, even in short scenarios. Make sure that your units don’t have wide gaps in the perimeter which would allow enemy forces to either impede your supply distribution or attack your supply depot!
- Do attempt to cut your enemy’s supply lines, especially in the Cotentin Peninsula, where two static IDs stand between you and Cherbourg. In Clearing the Beaches this is not as important since the game ends well before those divisions run out of supplies. In longer scenarios, though, isolate not only the static divisions to the north of UTAH, but also get into the habit of isolating the 91st Infantry Division (which was really called the 91st Air Landing Division) by pushing divisions south and west of Carentan to cut the Peninsula off from the rest of Normandy
There are other concepts that you need to learn when playing Crusade in Europe, but for now, these will do.
Commands to Remember:
Do not try to make circumstances fit your plans. Make plans that fit the circumstances.– Lt. Gen. George S. Patton, Jr., USA
- Move (M) tells a unit to move. If not followed by the Objective Command Here (H), this order puts the selected unit under Local Command and it will choose the closest and fastest route that its AI finds to a possible objective. This can be risky, though, because the unit can blunder into a situation that it might not extricate itself from. I prefer using the Objective Command after giving an Action Command, such as ordering the 50th British ID to MOVE to Bayeux and pressing H when my cursor is on that destination’s map hex
- Attack (A) tells a unit to attack. As with the Move Command, it is preferable to use the Objective Command Here rather than allow a unit to act under Local Command
- Defend (D) tells a unit to go in defensive mode and dig in. Again, the same caveat of using the Objective Command applies.
One thing to remember about the Defend command: The longer a unit is in Defend mode, the deeper it digs in. You’ll note that there are different levels of defense, ranging from a basic defense in which the troops dig foxholes and hunker down, then they become Entrenched, then Fortified, then they enter Garrison mode. The higher the level of fortification, the longer it takes a unit to be deployable – it takes up to a “day” for a division to go from Fortified to Deployed, and two to three “days” to make the transition from Garrison to Deployed - Reserve (R) serves two important functions. First, if you take a unit “off the line” and order it to go into this mode when it is “in supply” and not in contact with the enemy, it will slowly recover its efficiency levels and replace its losses from combat. How many men and tanks each unit gets “daily” depends on the replacement rates for each scenario. However, a decimated unit that is allowed to rest and recover usually is back to 100% efficiency within a “week” in-game time. Second, the Reserve command, when used to order a unit to go from Point A to Point B over long distances, puts that unit on TRANSPORT mode. The unit then moves faster – especially on road hexes – but it is also vulnerable to enemy attack
Efficiency Levels of Units (from the Crusade in Europe Manual):

100%: The unit is at its prime
90%: The unit has suffered from the effects of combat, but it is still in good shape.
80%: The unit is beginning to feel the effects of prolonged combat.
60-70%: The unit is definitely feeling the effects of combat. It should be withdrawn if possible.
40-50%: The unit is overstrained. It can be expected to deteriorate rapidly under pressure. It should be withdrawn as soon as possible.
30% and less: The unit will offer little resistance to enemy attacks, and may disintegrate on its own. Withdraw it immediately. – Sid Meier and Ed Bever, Crusade in Europe game manual
[1] The other two titles in the Command Series are Decision in the Desert and Conflict in Vietnam.
[2] This a good bargain, considering that when these games were originally released in the late Eighties, the MSRP was $39.99 for each individual title.
[3] For the purpose of Clearing the Beaches, Cherbourg is not an important objective because the scenario ends on June 11. Even if you set your game options to EASIEST by setting the balance to ALLIES ++, that’s not enough time to destroy two static divisions and drive to Cherbourg.

You must be logged in to post a comment.