* On Easy difficulty level
A nation’s ability to fight a modern war is as good as its technological ability. – Frank Whittle
I’m getting good at playing the Mobile Defense variant of skirmishes on Regiments.
Before I watched Amazon Women on the Moon last night, I decided to play a 30-minute-long session of Regiments, the real-time tactical-level wargame developed by Bird’s Eye Games and published by MicroProse last August.
If you’re a regular reader of this blog, you know that Regiments is a Cold War-turned-hot game that depicts a version of 1989 in which glasnost and perestroika failed to reform the Soviet system and a mutiny in the East German army morphs into a shooting war between the Warsaw Pact and the North Atlantic Treaty Organization (NATO).
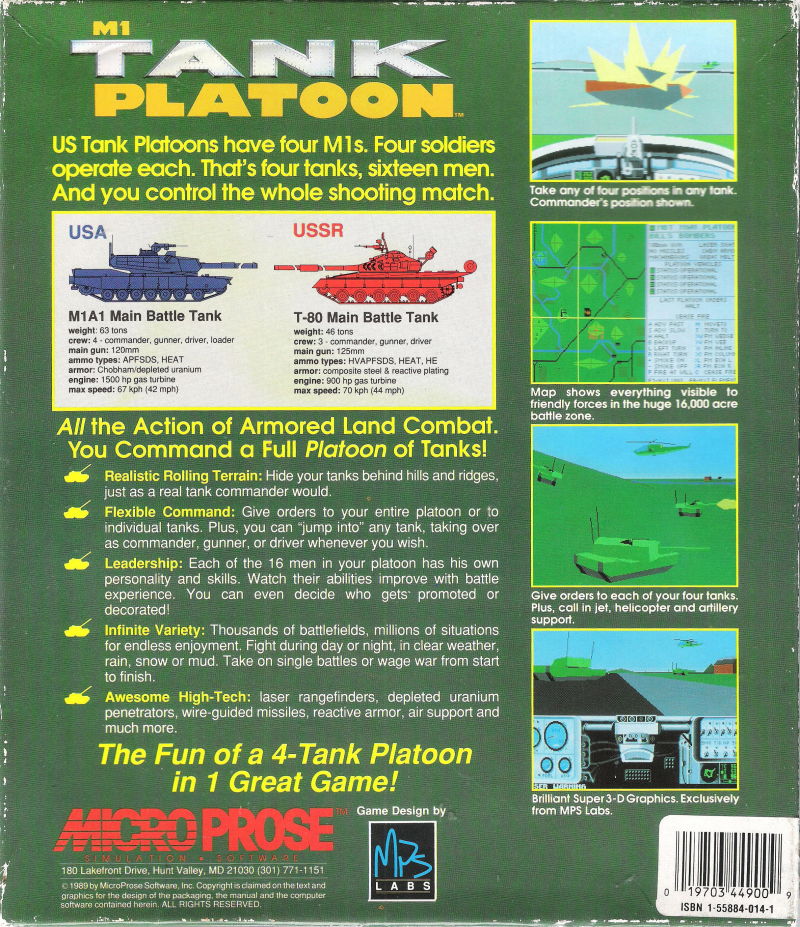
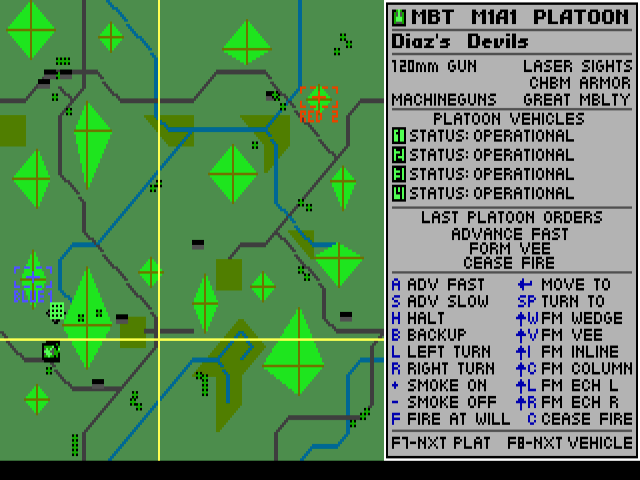
Like its older MicroProse cousin M1 Tank Platoon (which was released in the real 1989), Regiments focuses primarily on land warfare but at the regimental/brigade level. Thus, players get to command combined arms forces with late Cold War era equipment mixes and historically accurate units from both sides of the Iron Curtain.
I’ve written many Old Gamers Never Die pieces about Regiments, the three different types of game sessions you can play, and the various armies that are currently playable, so I’m not going to repeat a lot of what I’ve already written. Suffice it to say that even though Regiments has some limitations on what your units can do – for instance, you can’t order your units to deploy in various formations (such as the Vee, In Line, Column, Left Echelon, Right Echelon, or Wedge)like you can on M1 Tank Platoon or the more contemporary Armored Brigade – the game is still a good way to learn basic land armored warfare tactics while still being, well, a game.
The Best Defense…
Since late December, when Bird’s Eye Game first released Regiments’ first downloadable content (DLC) expansion [1] (the Second Wave expansion) that added playable British Army of the Rhine (BAOR) units and a new location map to fight battles in, I’ve been playing the Mobile Defense single battle mode. I was getting proficient in the Attack scenarios – less so in the Meeting Engagement ones – and I had yet to try Mobile Defense in the four months that I had owned Regiments.
I’ve already written a couple of blog posts about Mobile Defense, but in case you missed them, I’ll do my best to explain the basics of this type of battle.
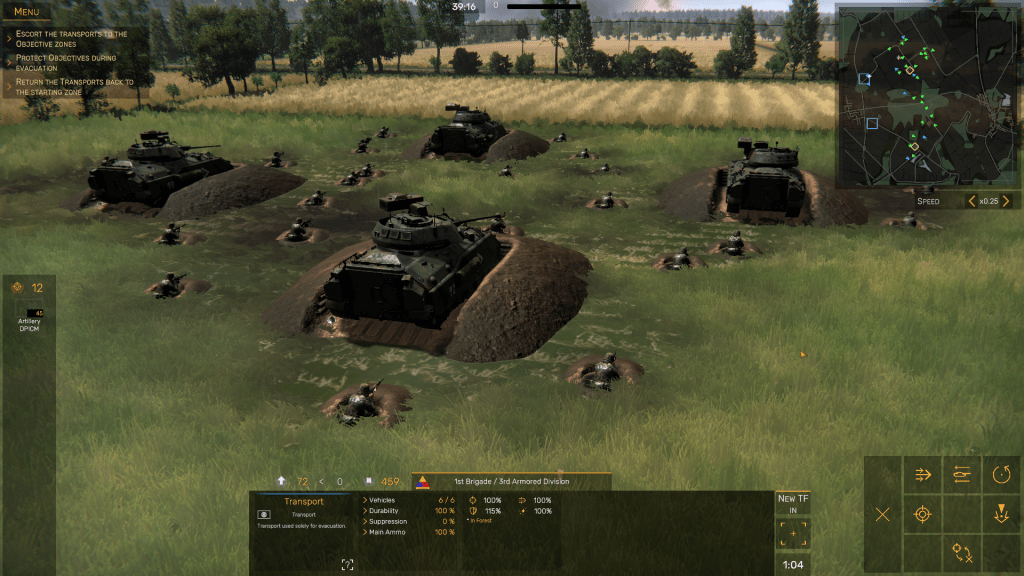
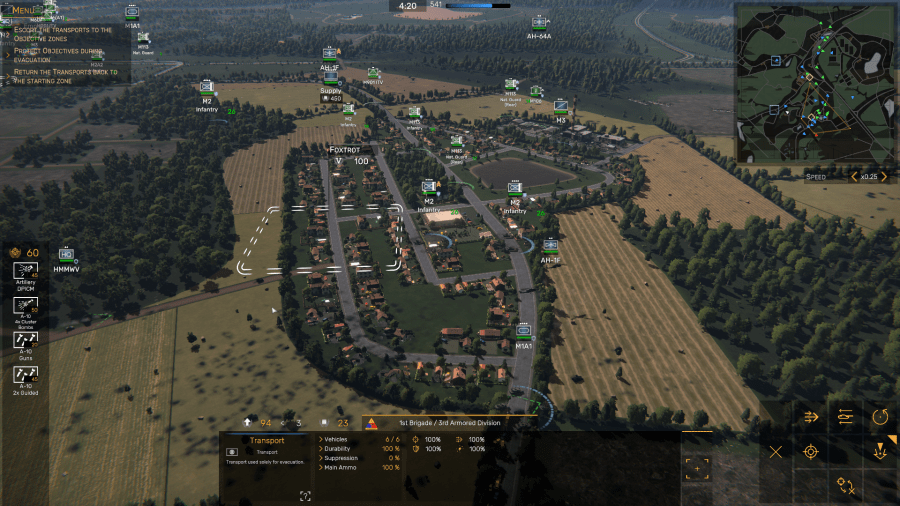
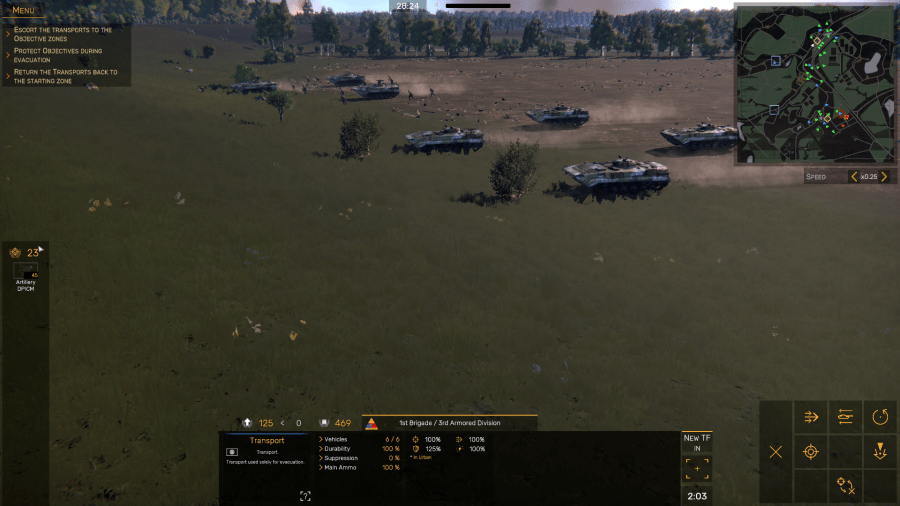
In Mobile Defense, you command your basic mix of task forces (the core one you get at the start of the game, plus three additional task forces you can request from Brigade HQ), a Supply unit, and two Transport units that are only available for this type of mission. Your mission as a commander is threefold:
- Defend the eight Objective Zones on the map from an attacking enemy force
- Escort the Transports to the Objective Zones to begin evacuation
- Return the Transports to the Starting Zones (there are two) and unload the evacuees there
Additionally, units marked in blue are deployed. Units marked in black and white indicate there are enough deployment points available (340) to select at least one or two, depending on the unit’s “cost” in DPs.
Each Mobile Defense skirmish begins with an Engineering Support/Initial Deployment phase. Here, you use engineering points to set up anti-tank positions, hide anti-aircraft vehicles, place observation posts, deploy small packets of mechanized infantry, or put up barbed wire obstacles. You only get 60 engineering points, and some items, such as the anti-tank posts, cost more points than others,
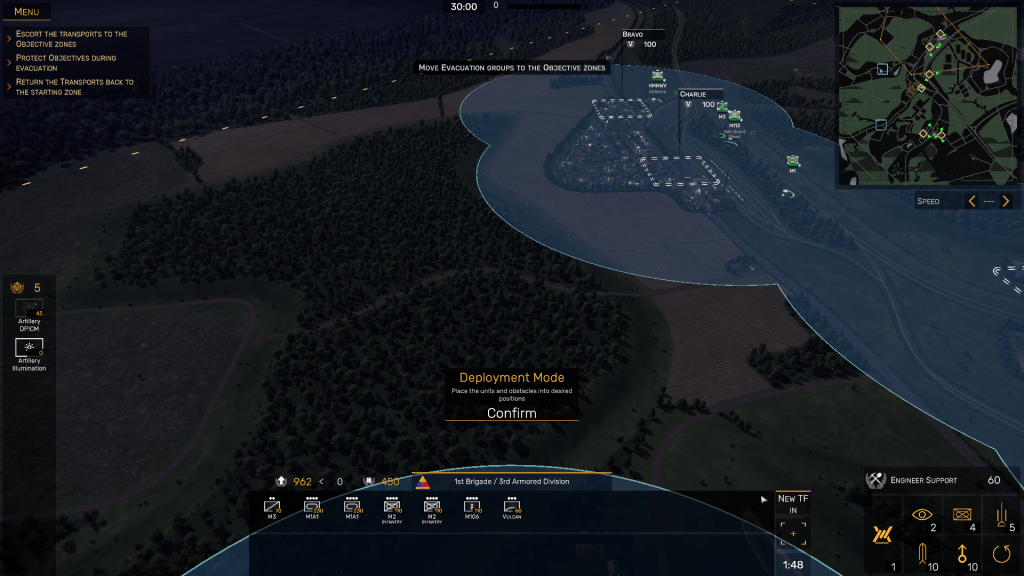
In this initial pre-battle stage you will also have an opportunity to site your core task force on the map alongside a friendly unit (marked in green) that is pre-deployed. This is a big help to players; it saves time at the start of a battle because you don’t have to issue a Move Fast command to your core unit and hope to hell it gets to its assigned location before the enemy does. (Of course, how many of your first task force’s platoon you can field in the pre-battle phase depends on how you’ve set up the Deployment Points starting level in the Set-Up Game screen. If you opt for the Normal number of DPs, you will not be able to deploy your entire first task force; there will not be enough DPs in the “bank.”)
Once you are satisfied with your initial deployment and defensive scheme, you hit the Confirm button, and the game begins in Pause mode.
“It’s All a Question of OZs….”
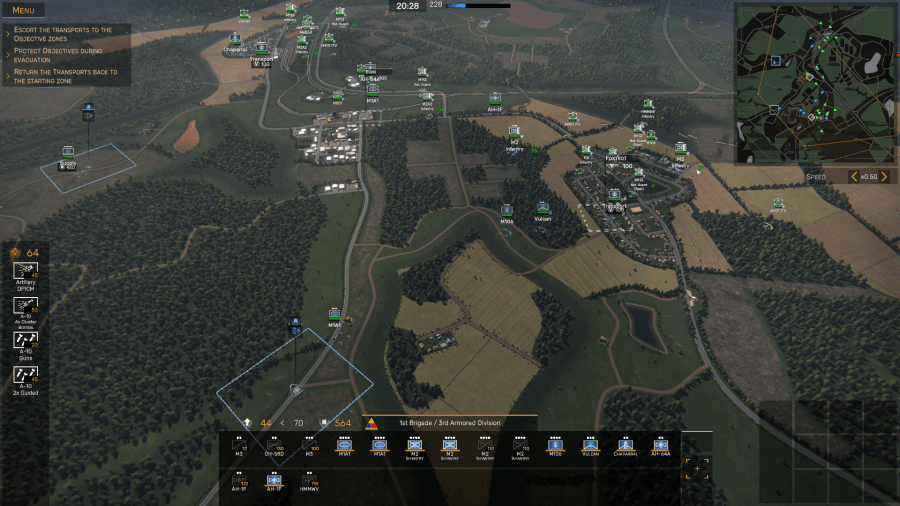
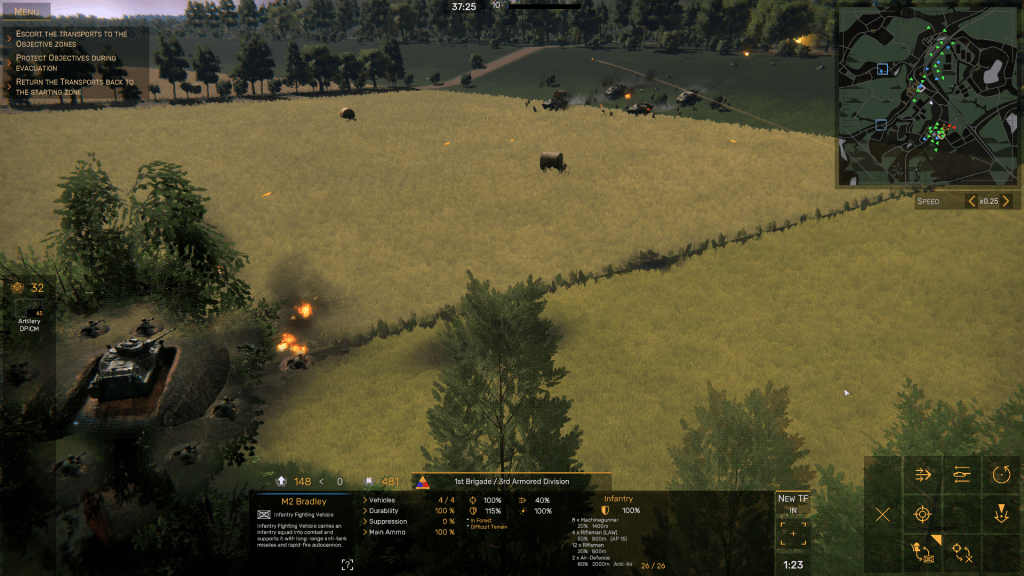
Although there are eight Objective Zones (OZs) on the map, labeled Alfa through Hotel, in Mobile Defense mode you only see two at one time. The game chooses which OZs you must send your Transport units to at random, so sometimes the first evacuation moves will be easy to carry out because they’ll be close to the Starting Zone, while at other times you will have to send the Transports to OZs further away from the Blue Force start zone – and closer to the enemy’s axis of advance.
The basic goal in Mobile Defense is to evacuate as many of your OZs as you can before your mission time clock (which you can set for as short as 20 minutes or as long as one hour) in order to earn 750 Victory Points. And you must do this while anticipating how, where, and when the enemy will attack, planning which of your additional task forces you’ll need when they are made available and whether you’ll employ a mostly static defense or carry out “fighting withdrawals” or “shoot-and-scoot” ambushes.
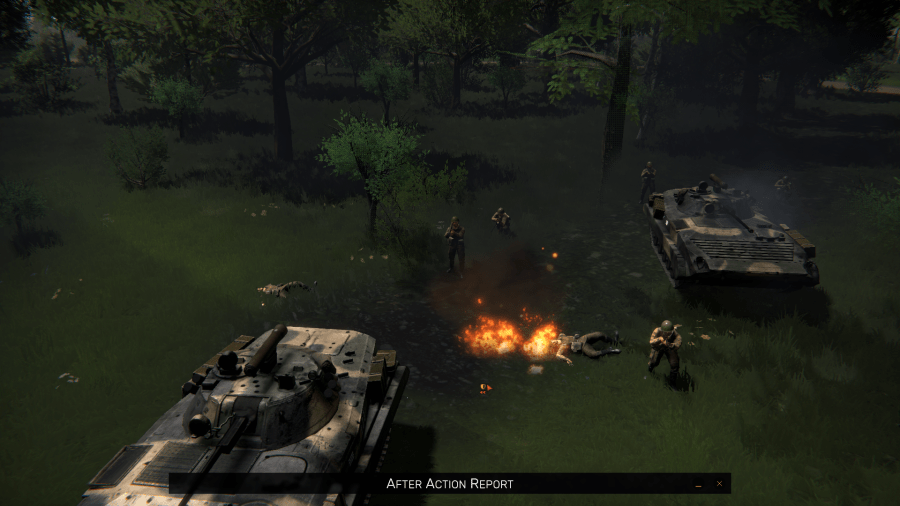
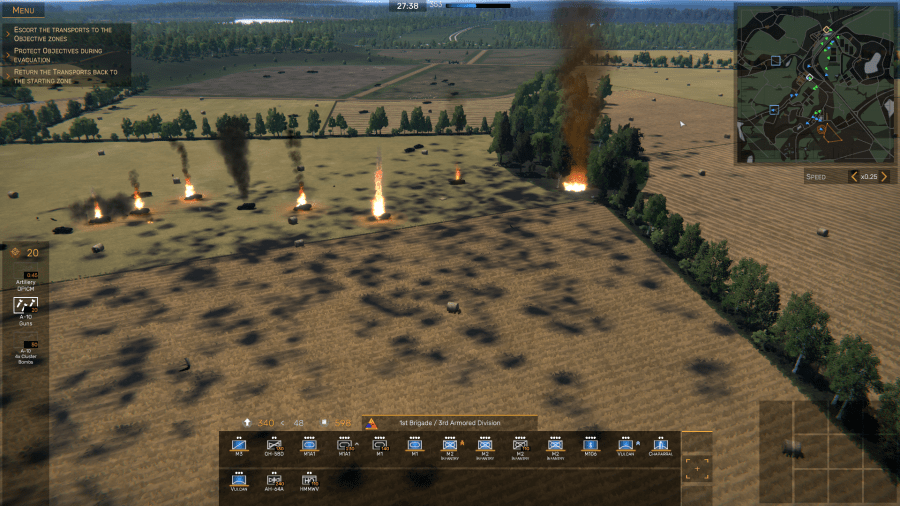
I’ve gotten good in this type of skirmish, at least on Easy difficulty-level settings. Last night, for instance, my Blue force (which consisted of four task forces from the First Brigade of the Third Armored Division (a U.S. unit assigned to V Corps in NATO’s CENTAG region in West Germany) suffered only light casualties (one M3 Cavalry Fighting Vehicle, 15 killed, 42 wounded, and 4 missing) compared to the Soviet 120th Guard Motorized Rifle Regiment, which lost 67 vehicles (including tanks, recon vehicles, infantry fighting vehicles, and mobile AA guns), 92 killed, 303 wounded, and 13 missing.
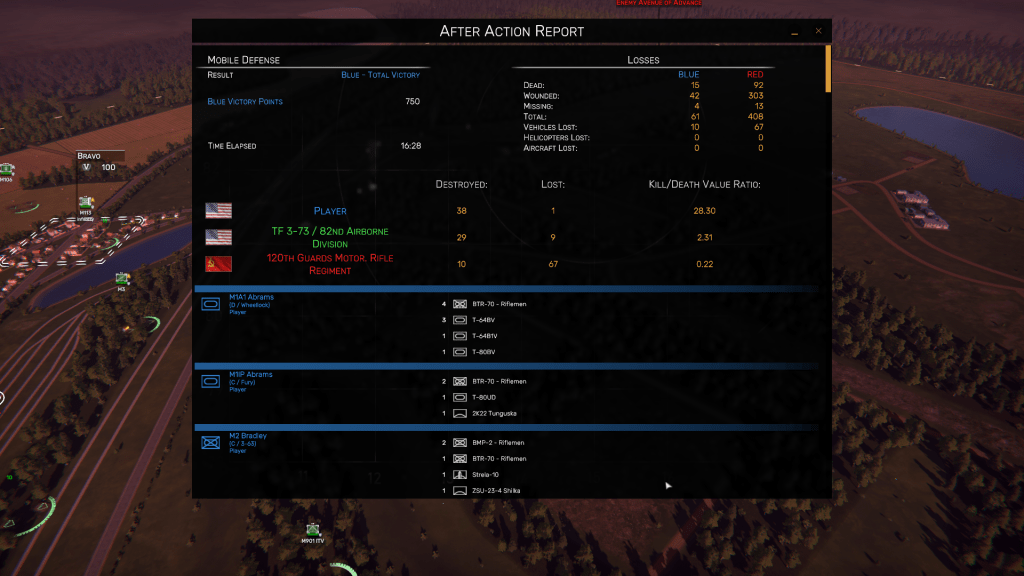
(The friendly unit that was controlled by the game’s AI, Task Force 3-73/82nd Airborne Division, suffered heavier casualties (9 vehicles and their crews), but they inflicted 29 of the 67 losses to the Russian vehicle force.)
Need I say that this might just be my best Regiments score so far?
I think I’ll play a few more Mobile Defense skirmishes while commanding other NATO units, then increase the difficulty level to Medium.
I don’t have anything else to share today, Dear Reader, so I will close for now. Until next time, stay safe and healthy, and I’ll catch you on the sunny side of things.
[1] Second Wave is also the only free DLC expansion pack offered by Bird’s Eye Games. Going forward, players must decide whether they want to buy further DLC content.

You must be logged in to post a comment.