“Be extremely subtle even to the point of formlessness. Be extremely mysterious even to the point of soundlessness. Thereby you can be the director of the opponent’s fate.” ― Sun Tzu, The Art of War
About Regiments

If you’re a regular reader of this space, you will doubtlessly recall that gaming is one of the ways in which I fill my empty hours when I’m not writing. Depending on several variables, including weather, my morale, and my whims of the moment, playing games on my desktop computer is my main form of coping with ennui and loneliness.

Although I play games from various genres – including NSFW adults-only ones such as Acting Lessons, FreshWomen, and Being a DIK – I will admit that the frustrated tactician in me prefers war games, especially those that are set during the Second World War and hypothetical Cold War-turned-hot scenarios pitting the U.S.-led North Atlantic Treaty Organization against the Russian-led Warsaw Pact.

One of my favorite titles in the latter category is Regiments, a tactical-level real-time strategy (RTS) simulation of land combat in late 1980s West Germany. Developed by a small European studio called Bird’s Eye Games and published by the revived MicroProse in late August, Regiments puts you in command of a regiment/brigade-sized unit from either the Allied side (the United States, West Germany, the United Kingdom (Great Britain), and Belgium) or the Warsaw Pact side (currently limited to the Soviet Union – Communist Russia – and East Germany).
Like many similar RTS games, Regiments has two major play modes:
Skirmish, which allows you to fight individual engagements as either the NATO or Pact commander in three types of battle: Attack, Mobile Defense, and Meeting Engagement.
Operations, or the Grand Campaign game broken up, like chapters in a novel, into a series of engagements that tell a story – Rashomon-like, if you will – of an alternate 1989 where glasnost and perestroika never took root behind the Iron Curtain and a rebellion inside Communist East Germany leads to a war between the Warsaw Pact and NATO in West Germany. These Operations are often divided into phases, each of which must be completed before the player moves on to the next, and the point of view shifts from the NATO alliance’s units to that of the Pact’s.
There is, of course, a third play mode – and the first one you should tackle before moving on to Skirmishes or Operations – that serves as Basic Training in Regiments. It’s called Tutorials, and they cover the basics of the game, starting with learning how to move the game’s camera, then moving on to how to deploy units, use your engineers, “retreat” damaged platoons, and set up defensive positions.

On Mobile Defense

“If you know the enemy and know yourself, your victory will not stand in doubt; if you know Heaven and know Earth, you may make your victory complete.” ― Sun Tzu, The Art of War
I have been playing Regiments since it was released on Steam on August 16. In the months hence, I have attempted to play all of the modes in the game, starting with – natch – Tutorials and gradually moving to Operations (on Easy difficulty settings). However, because the grand campaign has different rules than Skirmish mode and is less forgiving of a commander’s mistakes, I have played mostly the single battle Skirmishes, primarily the Attack ones, and usually from the Allied point of view.
Each of the three modes in the Attack category (Attack, Mobile Defense, and Meeting Engagement) requires a different, mission-oriented thought process since what works well in one, like aggressive and fast movement in the Attack scenarios, might not necessarily do the same in Mobile Defense.
Roles & Missions

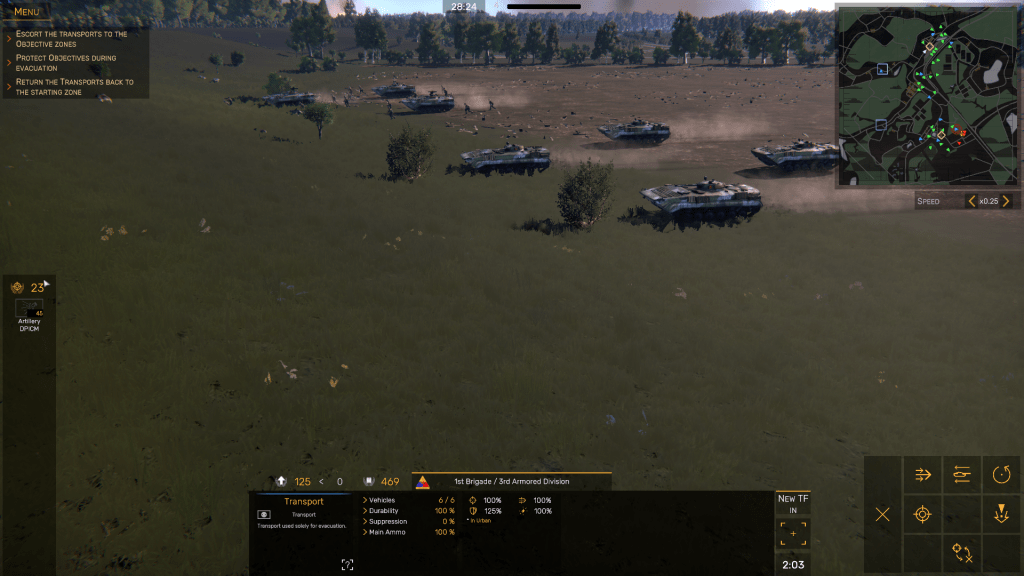
In Mobile Defense, your role as a brigade or regimental commander is to deploy your task forces in a defensive role near a series of objective zones (OZs) that the enemy force wants to capture. Your mission, as defined by the three bullet points on the upper left-hand side of the game screen, is threefold:
- Escort the Transports to the Objective Zones
- Protect the Objectives During the Evacuation
- Return the Transports to the Starting Zone

Mobile Defense also starts differently from Attack missions. Before combat begins, you are given 60 Engineer Support points that you can spend by setting up barbed wire obstacles, mortar positions, observation posts, anti-air defenses, and anti-tank positions. You can only use these points in the pre-mission stage, and you can’t build the defensive positions – each of which has a different point value – outside of your faction’s perimeter.
Oh, and in the pre-mission stage, you can place units in your first – or “core”- task force on the desired location on the battlefield (again, within your own lines and not “just anywhere”) provided you have enough Deployment Points (DPs), which is Regiments’ in-game currency that allows you to “pay” for deployable platoons or companies during a Skirmish.
Again, you only have 60 Engineer Support points to play with, so it’s not like you can put up a 1989 version of the Maginot Line with anti-tank guided missiles (ATGMs) or mobile anti-aircraft (AA) guns. You, of course, are the one who will choose how and where to use Engineer Support teams, but my advice is to “buy” a mix of observation posts (Ops), defensive positions, and ATGM/AA posts.

The terrain is one of the most important factors in modern warfare, especially for a defender. The AI placed the green color-coded units,, but I chose the locations of the units with blue icons. This session must have been in its early stages, since there are only a few shell craters visible and no “funeral pyres” of knocked out vehicles. 
The airbase has been evacuated (note the lack of a “flag” on the screen and the presence of several U.S. Army trucks next to the hangars. 
A screengrab from a gaming session shows how detailed the graphics are in ‘Regiments.’ This one is from an Attack skirmish. 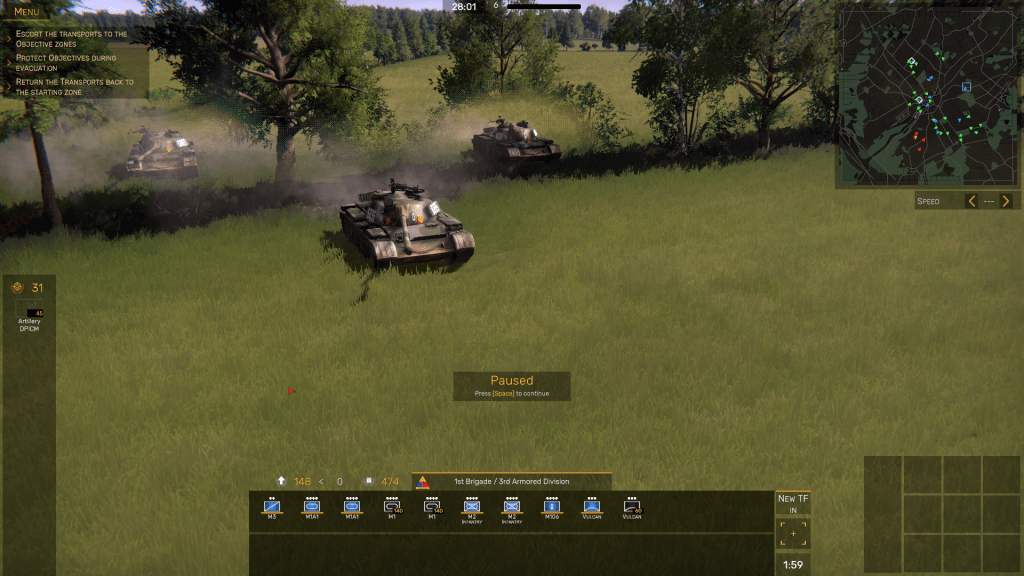
Holy shit, sir! Those are East German tanks! 
“They came in the same old way…we stopped them in the same old way.” A Soviet force (red unit icons, with a type of unit denoted) rushes toward a NATO defensive position …and is promptly slaughtered. Note the glowing trail of a TOW anti-tank guided missile heading toward a platoon of BTR-70 APCs, while five Soviet vehicles, presumably tanks, burn brightly at the upper center of the screenshot. 
At the latter stage of a Mobile Defense battle, you can see that OZ Foxtrot is heavily defended and has been the scene of fierce fighting. You can not only see the mix of helicopters, tanks, and mechanized infantry platoons carefully placed to prevent an enemy from capturing it but there are lots of shell craters and burned-out vehicles visible, especially in the foreground. Units with yellow chevrons next to their NATO symbols are veteran units.
The map helpfully shows you likely avenues of the enemy advance. You won’t see the enemy’s units until one of your OPs or defensive units “spots” them, but at least knowing from whence they’ll come will give you some idea of siting your defensive add-ons and first units before the battle begins.
“He who is prudent and lies in wait for an enemy who is not, will be victorious.” ― Sun Tzu, The Art of War
While I do not want to delve into every detail of the Mobile Defense missions, I will say that a wise commander will deploy the core force in terrain that favors the defense, usually in wooded areas, small towns near the Objective Zones, and other ground where a mechanized force will have difficulty in moving. If you have the initial amount of Deployment Points to maximum when setting up your game, use them all and place all your platoons on the field.
You will note that unlike in Attack skirmishes, Regiments also has, in static positions that you can’t command, other NATO units on the field already sited and ready for battle. This allows you to “spread your platoons around” and ensures that your task forces are not the only ones who will deal with the enemy on their own. They are designated by green-colored NATO unit symbols, and although you can resupply, reinforce, and repair these allied units (but not replace any of their destroyed vehicles), you can’t issue orders to them. (The AI will not move them, even in situations where a real-life commander would order a platoon to retreat to fight another day.)

Of course, as a battle progresses, you accrue deployment points continually and replace the ones you spent during the initial stage of the skirmish. Use these DPs to buy reinforcements from new task forces when they become available, or to re-deploy platoons that you retreated and underwent the repair/replace/resupply process.
Your main objectives in Mobile Defense are:
- Use the two Transport units assigned to your regiment and send them both to Objective Zones that are clearly marked with a “flag” and an OZ named after a letter in the NATO phonetic alphabet (Alfa, Bravo, Charlie, Delta, etc.). Regiments only allots two Transport units during the Skirmish, and it only designates two active evacuation zones at a time in randomly selected OZs. Each one of those active evac points is worth 100 victory points, which I think translates in real-life terms as 100 evacuees. Once an OZ has been evacuated, you can forget about it and not have to revisit it with your Transports. However, the game will then designate another OZ as an evac zone, so as soon as you unload one Transport unit in your starting area, send it pell-mell to the new OZ (which, of course, will have a “flag” and a NATO phonetic alphabet letter name).
- While your combat forces hold off enemy attacks – which are more impressive, I think, than the static defenders in Attack missions, perhaps because the game spawns larger task forces for the attacker and makes them more aggressive – your Transports must move quickly to the evac zone, then stay there till the trucks are fully loaded, and then return to your starting areas.
- Use new task forces as reserves and either place them in defensive positions as a shield in front of potentially vulnerable OZs, or launch counterattacks against enemy attackers stalled in front of strong points that are bleeding them dry. Remember, though, that Regiments does not reveal every enemy unit in the area; just the ones in your units’ line of sight or are detected – rarely – by electronic intelligence (ELINT) or signals intelligence (SIGINT). Just because your AH-64A Apache gunship can’t see a Soviet or East German ZSU-23-4 Shilka doesn’t mean it’s not there.
- The game ends either when the mission clock (which can be set from a minimum of 20 minutes to a maximum of 60) runs out or you earn (on Easy difficulty, at least) 750 victory points.

“Treat your men as you would your own beloved sons. And they will follow you into the deepest valley.” ― Sun Tzu, The Art of War
I shouldn’t have to say this, but as a commander in Regiments in a Mobile Defense skirmish, you must figure out how to save as many evacuees as possible while inflicting more casualties on the attacking force than the enemy inflicts on yours. Strike a fine balance between purely defensive moves and bold counterstrikes, set up ambushes with your ATGM-equipped mech infantry and attack helicopters, and learn the timing between the time that you call in an artillery strike and the time the first rounds hit the target area.
I have discovered that I’m a decent commander in the defensive and I lose less men and vehicles than the AI-controlled enemy units do. I still lose more helicopters than I’d like, but not as many as I do when I carry out Attack missions.

Also, I think that the graphics in this game are fantastic. The scale is not perfect, and I don’t believe Regiments depicts vehicle and troop dispersals with 100% accuracy; I think that tanks and the various armored personnel carriers (APCs) and infantry fighting vehicles (IFVs) tend to bunch up too closely together.
That having been said, I do like it when I remember to zoom in with the game’s camera onto a unit and get as close as possible to see small details on individual tanks, vehicles, and even helicopters, such as national insignia or regimental markings and distinctive camouflage schemes. You can even see the recoil effect of a tank’s massive cannon when it fires a round, and soldiers wear distinctive uniforms and gear that are accurate to the period (mid-1989) and their nationalities.


Regiments is, perhaps, my favorite game of the ones I bought last year. As I said earlier, as much as I appreciate the art in the adults-only games I bought on Steam in 2022, wargames are my go-to games, especially when I am struggling with loneliness and stress. Part of me will always regret that my physical disability precluded my choosing a military career, so Regiments, along with M1 Tank Platoon, Cold Waters, and Crusade in Europe, allow me to indulge the inner George Patton, Charles Lockwood, or Creighton W. Abrams in me.
“When the enemy is relaxed, make them toil. When full, starve them. When settled, make them move.” ― Sun Tzu, The Art of War

You must be logged in to post a comment.